Posted on 2 Comments

Two Dog Shirts for 50 Cents

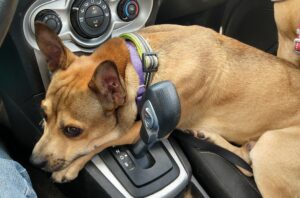
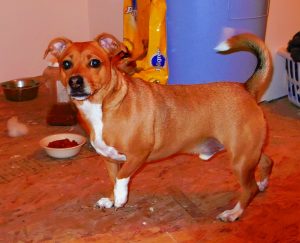
Edited to add my new dog who was not here when this post was created. His name is Chico Burrito.
Very soon I will have to figure out how to make three dog shirts for fifty cents!

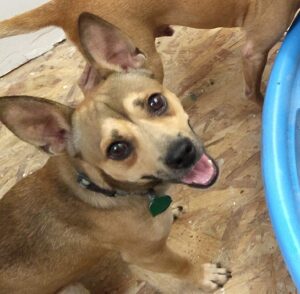
Okay…back to talking about dog shirts…
Have you seen the prices of clothes for dogs?! Yikes, unbelievable. It may be better to sew clothes for the dog yourself. But oh, have you seen the price of fabric these days?! But there is a solution.

Whether you say thrifty or cheap, or if you call it recycling or upcycling…getting two shirts for the dogs for a grand total of 50 cents seems like quite a bargain. Here is how it can be done.

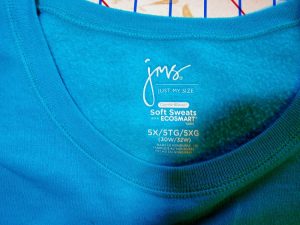
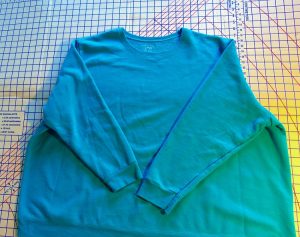
We first take a trip to the local thrift store where we find a snappy blue sweatshirt in size 5.

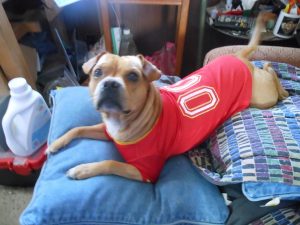
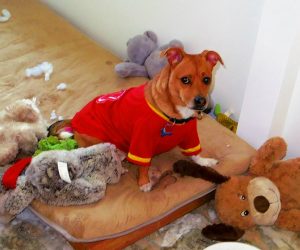
We’ll start by assuming that you already have a sewing machine and know how to sew. Also, that you have decent scissors, pins, thread and that you know how to copy a pattern from a shirt that your dog already loves – just trace around the old shirt onto some brown paper. Here is Jack in his favorite red shirt. It fits him perfectly. Jack is too sexy for that shirt.

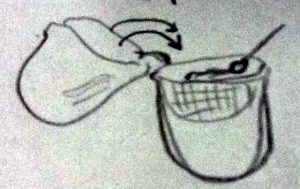
After running the sweatshirt through the washer/dryer we will prepare to cut away some of the seams. Leave the lower ribbing intact; don’t cut that part. And when cutting off the neck ribbing, leave the seam attached to the neck ribbing; we’ll be using that ribbing later.

Lay sweatshirt flat; prepare to cut away seams.


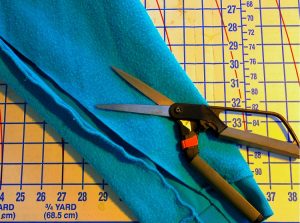
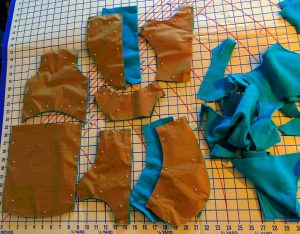
Here is the fabric ready to be used to make the two shirts.

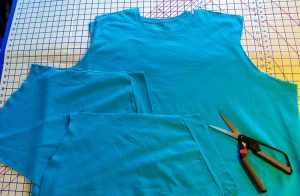
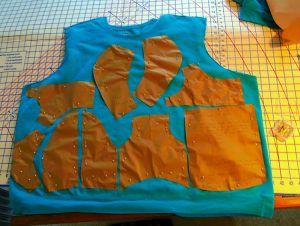
Lay out the pattern pieces keeping the grainline in mind, pin in place then cut out. Save the scraps; they may be needed later.


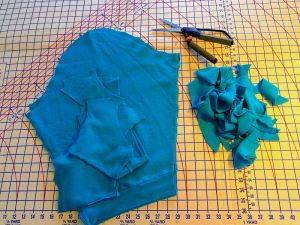
This is what’s left of the sweatshirt after all the pattern pieces have been cut for two shirts. There is enough fabric to make half a shirt. All we need is another sweatshirt in a coordinating color but that’s a job for another day.

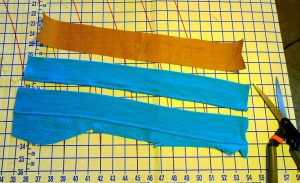
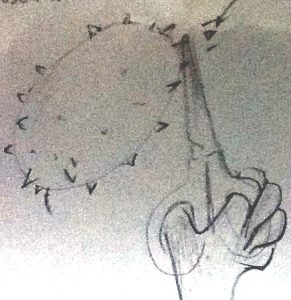
For the neckline, we will re-use the neck ribbing that we cut from the sweatshirt. Cut the fabric slightly longer than the pattern piece.

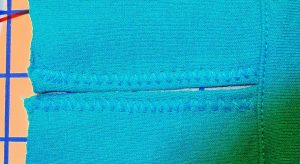
On the old red shirt, there was a small opening about the size of a buttonhole meant to be used to attach the leash to the harness. Since I found the hole to be too small for fat fingers, I made a slight design change. Instead of making a buttonhole type opening, I opted for this. And check out what a good color match the thread is.

Here is the same piece which has been assembled with the back and front pieces. 

Okay, since you know how to sew, the rest is easy. Just sew all the seams, try it on to make sure it fits, make adjustments as needed, and that’s it!

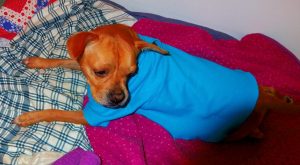
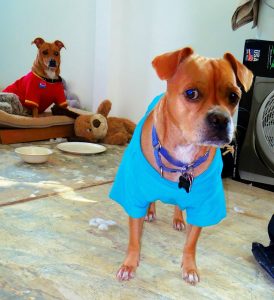
Jack loves his new shirt. It is very comfortable.

Uh, oh. Here comes trouble. George wants to see the new shirt. George tries offering a toy to Jack hoping that Jack will give up the shirt. No, that’s not gonna happen. Jack turns his back on George.


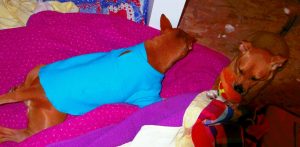
Problem solved. I gave George the red shirt to wear and Jack is happy in his new blue shirt.


George doesn’t know how to read yet so he has no idea that the title of this page is “Two Dog Shirts for 50 Cents”. I will make the second shirt and George will be very happy, plus he can keep all his toys.

Hey, I found a great site. Upload your own images to Jigsaw Planet just like this:
https://www.jigsawplanet.com/?rc=play&pid=2fdee15435c0

Posted on 2 Comments

It’s my birthday!

It’s my birthday!

I feel that since it is my birthday that I should decide what to do today. I had offers to go out to a nice restaurant for lunch, but no, I don’t want to get dressed up. I want something different on my special day.

So I dressed like a bum and took my dog for a drive to Tractor Supply. Jack loves to ride in the cart. Jack actually thinks that Tractor Supply is PetSmart, but hush, do not tell him the truth!

Jack met so many friendly people who admired him, petted him, shook his hand, allowed him to kiss them and paw their clothes. I am surprised at the number of people who have heard of a Puggle but have never actually seen one. I am beginning to see what it feels like to own a dragon, a unicorn or a leprechaun.

Jack was a happy boy today. Which made me happy.

I bought dog food, which was the original purpose of the long drive. Then I saw that Preen was on sale…not for $29 or $26.97…no, it had been marked down to $19.99 and then further marked down to…be still my heart… $14.99. Woo-hoo. I grabbed two lovely yellow drums.

As I approached the checkout I noticed the clearance area. Jack stood by while I checked…
Horse feed – no, I have no horses.
Beet pulp horse feed – no, still have no horses.
Bird food – no, I don’t feed wild birds.
Ah, here we are. Dog food. Good quality dog food at 1/2 price. Yep, grab two bags of…whoa, these are heavy, how the heck big are these bags? Gonna need another cart.

Then I remembered the garden soil that was on a pallet outside in front of the store. I told the clerk I would like about 4 -5 bags, please, as that’s about all the bags that were not broken. The clerk then said the magic words…”The broken bags are 1/2 price.”Someone else’s voice came out of my mouth and said, “Okay, I will take all of them, broken and not broken” as I quietly tried to calculate if I could fit all this into my little car.

I declined the offer to have an employee assist me in loading the car. One thing I learned is that no one likes to take direction when loading a car. Better to do the job by myself, slow and steady, step by step, take time to breathe, rest, method.

Oh, dear. I need two hands to get this stuff loaded into the car. What to do with Jack? He can’t wait in the car with the doors open; he would jump out and make lots of new friends in the parking lot. If I attach his leash to a signpost, he will most likely pee on the merchandise. Aha!. A helpful customer stopped by. Yes, I happily accepted her offer to keep Jack company while I sweated and strained to load sixteen tons and got another day older – but not deeper in debt. Here is the helpful customer with Jack standing in front of the empty pallet.
Thumb of 2014-08-02/greene/dae59f

Another customer came by and looked as if he would have offered to help, except that he was dressed in white from head to toe I figured he was either an ice cream man, an evangelist or quite possibly a figment of my imagination as I was slightly lightheaded from the heat – or maybe he was just too clean to get dirty.

After what seemed like an hour but was most likely about 18 minutes I finally had all 13 bags of soil stowed in the car, plus 3 bags of dog food, 2 bottles of fly/mosquito repellent for dogs (the fly spray can be used on horses but as you remember, I don’t have a horse), 3 squeaky toys for dogs, and the two tubs of Preen.
Here is my poor little, sagging car: Thumb of 2014-08-02/greene/5d5919

And the trunk is full, too. Okay, the fact is that the trunk was already mostly full of shovels, clay pots, landscape fabric and some tools. So now it is more full.
Thumb of 2014-08-02/greene/7c57b7

Um, what am I forgetting?

I sat down to have a drink of water.
There must be one more thing I need to put in the car. What was it?

Oops, the dog!!!

Here Jack, see if you can find a place to sit. No, there’s not enough room.
Okay, stand. You can stand all the way home. It will be fun. Each person should be able to have fun on their birthday.
Thumb of 2014-08-02/greene/6d4340

It’s my birthday!

(Originally written in August 2014)

Posted on Leave a comment

African Horned Melon, part 2: Everything but the Horns

My friend Plant Sister is at it again, using almost every part of something like food. She says, “I learned from my mother about many things: Do not throw away food or let it go to waste”.
Written by Plant Sister and myself.

While preparing to write the original Horned Melon/Cucumis metuliferus article, I ate the green “jelly” part of the fruit and spat out the seeds. One Horned Melon gave me a single serving of fruit and some seeds. That’s all. No more. Unless you count what I tossed into the compost bin. There was so much wasted that I simply did not “see” as food.

My friend Plant Sister, who lives in southeast Asia, thought my article could have been more complete. She shared with me what she had learned from her mother. Plant Sister wrote the instructions for this article and provided photos and original drawings; I did the editing, adding three photos and a few comments, and I learned a lot in the process!

From a single Horned Melon fruit, Plant Sister can get:
One small bottle of the green Horned Melon juice (approximately 30% juice/70%water),
One small cup of green Horned Melon “jelly,”
One tablespoon of orange Horned Melon “meat,”
Plus all the seeds… “Seed for sharing with people who love to grow their own food,”
Horned Melon Peel, to be dried and later used to make a tea.

Plant Sister thought it would be good to explain how to utilize the many parts of the Horned Melon so that more people could learn how useful this fruit is.  She said, “Thank you for letting me have a chance to tell you about my experience with the method. I took the fruit in my hand and …did it step by step…learning by doing.”

The steps:
—Use scissors to cut each tip of the sharp horn of the Horned Melon as my drawing shows.

Please cut only the hard horn at the tip of each horn to avoid getting jabbed with the sharp points.
Thumb of 2014-10-26/greene/b8e84f 
—Wash the Horned Melon in a salt solution (about 1/2 teaspoon salt dissolved in 3 cups of water). —–Do not rinse. Let air dry.
—Cut the fruit, scoop out the green jelly and seeds; each seed is inside a sac.
Thumb of 2014-10-26/greene/cceee8 Thumb of 2014-10-26/greene/f92a9e

Now we will make the juice/water mixture and retain the green pulp:

—Place a colander into a bowl. Put the green seed sacs into the colander.
—Prepare 60 ml. water. Please use water that has been boiled and allowed to cool to room temperature.
—Pour the water onto the seed sacs. Using a teaspoon, “stir lightly but quickly to separate the seeds from the sacs.”Put the green seed sacs into the colander.


—Reserve the water and use this water to repeat the sieving process again and again until all the seeds have separated from the sacs.

—After the last sieving, save the water, which will be approximately a 30%/70% Horned Melon juice/water mixture. Remove everything from the colander.
Once the seeds and the green sacs/solids/jelly are separated, place each part in a cup: seeds in one cup, solids in another cup.
“In addition to the juice/water mixture we now we have one amount of the seeds and one amount of green sacs/solids/jelly each in a small cup.”
Thumb of 2014-10-20/greene/de7826 Here is a bowl of the green “jelly” after the seeds have been removed.

When I was preparing my Horned Melon, that was my stopping point. Plant Sister takes this a bit further, obtaining more food from the single fruit. She has kindly included her own drawings to show the process.

—Use a tablespoon to scrape the orange-colored “meat” from inside the peel/rind as the photo shows.
Thumb of 2014-10-20/greene/8e767a
The Horned Melon meat is mixed with the water and some coconut sugar and a bit of salt are added.
Thumb of 2014-10-20/greene/0d7fa5
Plant Sister says: “It had a sweet smell of the coconut sugar.”

—Using scissors, cut the outer peel of the Horned Melon fruit into julienne strips. Allow the peel to dry.

Note: if you live in a damp climate you may want to use a dehydrator for this process. “This is the photo of the dried peel, which we can use for tea”.
Thumb of 2014-10-20/greene/2384ca

“I am very happy I can teach the method to other people. This method will be useful to them, and the original article about the Horned Melon will be more complete. Thank you for letting me have a chance to tell everyone about my experience with the method. Please have a good day today. I hope you like ‘all’ the Horned Melon today!”
Plant Sister

Plant Sister’s mother, who is over 94 years of age, will be smiling today, knowing that more people have learned not to let food go to waste. Using Plant Sister’s method you can now use everything but the horns.

Photos, instructions and original drawings by Plant Sister.
Photos by therealmgreene: Horns, Pulp with seeds, Seed in Sac.
Edited by therealmgreene.

Originally published February 2015

Posted on Leave a comment

African Horned Melon, part 1

This fruit has many names. It originated in Africa and has been called Horned Melon, Hedged Melon, Melano, and a few other names, the most amusing one being Jelly Melon and the most inexplicable one being English Tomato. The fruit made its way to New Zealand, where the name ‘Kiwano’ (a patented name) was added because they had such good luck getting the world to eat Kiwi fruit and thought Kiwano would catch on more quickly than African Horned Melon.

Whatever you call this fruit, it certainly is unusual.
The plant is similar to a cucumber or melon vine, which you can either allow to creep along in the garden or provide support. The fruits start out small and green, covered with horns. The young fruit is similar in color to the leaves, so it can be hard to spot and may come as a surprise while you are weeding or re-tying the vines. Ouch, yep, that was a horned melon all right. Each vine can produce up to 100 fruits. Ouch, there’s another one! As the fruits grow and ripen, they change from green to whitish, then yellow, and finally orange.
Thumb of 2014-01-17/greene/c86628;Thumb of 2014-01-17/greene/59e0b8;Thumb of 2014-01-17/greene/4889c2

Horned melons require very warm temperatures to produce a crop, so it’s best for many gardeners to start the seeds indoors. The seeds are a bit fussy about temperature and will not germinate until about 58 F.
Thumb of 2014-01-17/greene/04a836;Thumb of 2014-01-17/greene/aba80e;Thumb of 2014-01-17/greene/ad4188

Once your outdoor weather stabilizes to above 60 F, you can transplant the small plants into the garden. Keep them well watered until established and add mulch once the soil warms to 75 F. I grew mine in a very large container in full sun, quickly learning that a strong support was needed – a tomato cage was not gonna suffice. The vines were well behaved at first, staying within the confines of the provided support. Later they tried to reach over the fence where the beans were growing.

As for disease and pests, all I can say is that my plants were not bothered by any insects. The mice, which always eat my strawberries, did not bother the horned melons. Near the end of the growing season, however, the vines suffered from wilt, as may happen with some other cucumber/melon relatives.

The plants do not like any amount of cold weather, so plan ahead to harvest before frost, but the fruit is very cooperative. Cold weather was approaching and I had to dash outside to harvest all the fruits even though they were still quite green. Here’s the good part: If the fruit is kept at room temperature, not refrigerated, it will ripen and will keep for several months. Yes, you read that correctly. Being a skeptic, I just had to do a test with a few of my fruits. Yes, it’s true. Some that were picked green in November lasted until early January at room temperature, no refrigeration.

Here, have a look and ripened just fine. Lovely color.Thumb of 2014-01-17/greene/b7f323
Thumb of 2014-01-17/greene/d3c02c Thumb of 2014-01-17/greene/0e184a

As for the taste, hmmm. You can research and see what others think – that the fruit tastes like a cross between a cucumber/lemon/banana/zucchini. Some people hate it. Some are put off by the green color. Many don’t like fruit that looks like a medieval weapon. Or you can just dig in and taste for yourself. The type of seed you plant, the soil/temperature/growing conditions, and other variables all contribute something different to the taste of the fruit. To me, they tasted a bit like kiwi, but they were more fun to eat because I spit out each precious seed to save for next spring.

Each seed is surrounded by a lime green, jello-like sack (I don’t know the technical term). The entire fruit can be eaten: rind, pulp, seeds and all. They can be eaten at any stage of ripeness, from green to orange. The leaves can be cooked and eaten like spinach. (Nope, I did not try that!) The fruit pulp contains vitamins A and C and iron and fiber. As with any food crop, please know the source of your seeds as there are “cousins” of the edible horned melon that are quite bitter and inedible and possibly toxic.

I communicate daily with my Plant Sister who lives halfway around the world. It was she who first introduced me to the African Horned Melon. It was the trading of these seeds that started our friendship. She tells me that the rind of the Horned Melon is very high in Vitamin C. You can make Horned Melon Rind Tea rich in Vitamin C: Slice the rind, dry/dehydrate it, and store it in a glass jar in a dark cabinet. The seeds are available from Baker Creek and several other companies. If the seed package says ‘Kiwano,’ the fruit will likely be sweeter than an unnamed variety.

Thumb of 2014-01-17/greene/4f61fb;Thumb of 2014-01-17/greene/34f60d
I ate the Horned Melon with a spoon as a taste test, then later mixed the pulp with plain yogurt (excellent), in a smoothie (very good), on ice cream (no, not so much – I still prefer chocolate), and on cake (everything tastes good on cake!). A few ideas for later: Horned Melon Salsa or a lovely green sherbet. I am told that some people make a “Horned Melon Martini” and in the southern part of the U.S. they make a “Blowfish Melon Cocktail.” What’s next? “Jelly Melon Shooters”?

Almost forgot, yes, the pulp can be strained and made into jelly. I have GOT to try that one!
But for now I’m still working up the nerve to prepare Roasted Horned Melon as is done in their native country. Don’t think there is a recipe for that in mom’s Fanny Farmer Cookbook.

Edit: Update for the Horned Melon seeds planted Jan 30, 2014: 30 out of 36 seeds have germinated by Feb 5, 2014. These seeds were saved from the fruit grown in Savannah, picked in November while green, allowed to ripen indoors, and seeds cleaned by the fermentation method in water as for tomatoes.

Originally published March 2014

Posted on Leave a comment

Prickly Seed Pods

One year I removed some dry, prickly Leonotis nepetifolia seed pods – with my bare hands. Ouch!

Having learned from my mistake, the following year I harvested the prickly seed pods and attempted to remove the seeds while wearing gloves. Alas, I was not destined to be a brain surgeon and was all thumbs. I needed a better idea.

Rather than tell you my idea, let me show you in pictures. Follow along.

Thumb of 2013-12-03/greene/b90d4dThumb of 2013-12-03/greene/d61e4bThumb of 2013-12-03/greene/7e75a8;

Plastic (not glass!) container and a few small, heavy items. Mix well and shake.

Thumb of 2013-12-03/greene/c5e1ab;Thumb of 2013-12-03/greene/9022f4;Thumb of 2013-12-03/greene/61310d;

Seems that my camera has an ‘Anti-Shake’ mode, so no photo. Here, how’s this?

Thumb of 2013-12-03/greene/4e16c6;Thumb of 2013-12-03/greene/2936c0;Thumb of 2013-12-03/greene/db8172
That’s it! Your seeds can now continue drying and soon will be ready to share, trade, or plant. This also works for many other types of seed pods, prickly or not. So get shaking!!

Originally published 2013

VisitThe National Gardening Association http://garden.org (formerly All Things Plants) to learn more about Leonotis nepetifolia.https://garden.org/plants/view/112255/Lions-Ear-Leonotis-nepetifolia/

;


Posted on Leave a comment

Homemade dog food

DOG FOOD RECIPE; Home canned dog food

3 Lb. fresh Meat – chicken, duck, rabbit, turkey, beef, lamb, venison, liver, gizzards, heart or any combination thereof; if using ground beef it should have a high-fat content
Sweet Potato – 3 large, chopped
Fresh Spinach – 1 lb, uncooked
Fresh Peas – 1 lb, uncooked (or cooked garbanzo beans)
Oatmeal – 1 cup, uncooked (optional par-boiled barley)
Brown Rice – 2 cups, cooked
Fresh Eggs 4 large, lightly beaten
Egg Shells – 4 large, rinse and bake @ 350 for 10 minutes, process in blender until they look like fine sand
Non-Fat Plain Greek Yogurt – 1 cup
Fish Oil – ½ cup (Salmon oil or flax seed oil)
Fresh Parsley – ½ cup, finely chopped
Glucosamine – ¼ cup, powdered
Tomatoes – 3 large, chopped or diced
Dried Kelp – 10 Tbsp, crumbled
Fresh Garlic – 7 cloves, finely chopped (some may opt to omit garlic)
Water – 6 to 8 cups

In a large pot, boil 6 cups Water, add sweet potatoes and peas. Cook until tender.

Add meat, oatmeal, rice, fish oil, tomato, and garlic. Cook 40 minutes or until rice is done.

Add remaining ingredients, cook another 30 minutes, add water as needed for very thick, stew-like consistency. Remove from heat, immediately spoon into pint jars, top with lid, tighten band (do not over-tighten), process in pressure canner at 15 pounds for 90 minutes. (Follow directions for your pressure canner.) Cool completely, remove bands, check seals after 24 hours, store in cool, dry area.

Adjust ingredients to suit your dog’s dietary requirements; check with your veterinarian.

Note: I just bought an Instant Pot. Here is a link to homemade dog food cooked in an Instant Pot. https://traditionalcookingschool.com/food-preparation/homemade-dog-food-in-the-instant-pot/

Posted on Leave a comment

Pudding, Vanilla Pudding (without eggs)

VANILLA PUDDING WITHOUT EGGS

2 1/2 C whole milk (half milk/half cream may be used)
3 T cornstarch
dash of salt
2 t vanilla extract
2 T butter (unsalted is best; if using salted butter, omit the dash of salt mentioned earlier)

Working in a heavy-bottom saucepan, pour 2 Cups of milk, sugar, and salt. Medium-low heat. Cook and stir just until mixture begins to steam. Do not boil.

In a bowl combine cornstarch and remaining milk, blend so there are no lumps. Add the cornstarch mixture to the hot milk mixture, stirring constantly until it starts to thicken. It should almost but not quite come to a boil. Reduce heat to low/very low, cook and stir for 5 minutes more. Remove from heat, add butter and vanilla.

(I cheat and place the milk and cornstarch into a shaker jar, the kind used to make homemade powdered protein drinks, then pour through a strainer into the hot mixture while stirring constantly.)

This next part may start a fight at your house. Spoon hot pudding into small glass serving dishes. Immediately cover each dish with plastic wrap to prevent a skin from forming on top of the pudding. That’s where the fight comes in. Some of us actually like that skin.