March 3, 2018
Here is my day so far.
The big dog Allie woke me up about 1:30 am with here super loud licking noises (she has very clean feet). Instead of giving her a gentle kick, which is what I should have done, I used my voice and said, “Stop it, Allie!” Well, that was the cue for the baby chicks in the plant room to start cheeping…since they knew I was awake. Sigh.
I checked on the chicks and they had made a mess with their water and their bedding was wet. It’s not good to have wet, chilly chickens, so there I was cleaning the container at some strange hour in the morning. After that, I could not get back to sleep. Of course, the big dog Allie and her clean feet had no trouble getting back into slumber-land.
Note: I purchased the 6 Buff Orpingtons on February 24, 2018. They were approximately 2-3 days old at that time.
One of the chicks, the one I named Dottie, is not doing well. It is called ‘failure to thrive’. She is less active and growing much more slowly. She’s a runt…or maybe she will be a rooster and (I think) they tend to grow more slowly. What the heck, I was awake anyway, so I did some research. Lots of stuff I could buy but not between 2 and 3 in the morning, so I went with Plan D which is honey in water. I managed to get Dottie to take some and will continue with that until I can get to a store later today. I also looked into waterers for chicks/chickens and figured out which ones to buy.
(Not my image; I found it here: http://naturalchickenkeeping.b…🙂

With the chicken research accomplished, I took a short nap and woke at 9:30 am. Allie stayed in the nice warm bed. Shared a small can of BeanieWeanie with two of the dogs and only spilled a little on my pants. Just as I was scraping the last bean out of the can Allie woke up and came running to get some. I tried to get enthused to do some yard work. Hoping to cut some grass, I walked out into the front yard to check on the dew situation. My across-the-street called me to come over. She seemed excited like there was some big news. No, not news. She had a tiny problem.
You are gonna love this one…
Seems their little dog was in the yard playing with the adult son, José, and the dog started acting weird. José called for his mama to help…then together they waited for me…because they think I am the dog expert.
They showed me the problem. It was one of those…”Why do I have to be an adult right now?” moments. There was a piece of bone stuck in the dog’s throat. I said it was a tiny problem because the dog is tiny, the dog’s throat is tiny, but I could not get my fat fingers in there to pull that big piece of bone out. I was afraid it would get shoved back too far and…well. You know.
Not knowing what kind of tools or utensils they had on hand, I used my best sign language to make a pinching and pulling motion. Mama sent José into the house. While we waited for José I instructed Mama to hold the dog upside down and pat it on the back – I held the back legs up and she held the head down and together we patted the dog’s back.
José came back with needle-nose pliers. Together the two of them held the dog still and held the jaws opened. It was my lucky task to pull out the bone. No luck. I did manage to loosen the bone…so quickly I grabbed the dog’s back legs and held them up and Mama pulled the dog’s head down – good thing we had practiced this maneuver! I started to pat the dog on the back but José said, “No!” The bone fell out onto the grass.
They were ever so grateful. But the most grateful was the dog. Oh, by the way, the dog’s name is Gato…which means ‘cat’. Pretty funny. Anyway, Gato was hugging me and kissing me and was really appreciative doing the whole butt waggle thing and all. Made me feel pretty good.
After the excitement was over, I managed to cut grass/weeds for about 30 minutes. I am now taking a well-deserved rest.
Update 10 pm – same day.
I could not stop thinking about the little chick named Dottie. There is very little I can do for her but I have to at least try. I did more research and made a decision. Loaded the dogs into the car and drove (through horrible rush-hour traffic to the Tractor Supply store in Rincon, Georgia. I looked to see what, if any, chicks they had available. My hope was to find more Buff Orpingtons, but no, none of those today. I made the best choice of the available breed and selected one called Production Red (not a very imaginative name). They are a cross between Cackle Hatchery’s Rhode Island Red and their New Hampshire chicken.
Instead of one brooder I now have a duplex brooder (these are both inside the grow tent). One brooder for the 5 larger chicks and one for the new 4 chicks and poor little Dottie. I am hoping that being with chicks her own size will give her a fighting chance to survive, thrive and grow. To create the duplex it was necessary to buy another feeder, waterer and a heat lamp bulb. I also bought some Nutri-Drench (add to their drinking water) to help all the chicks. Maybe tomorrow I will take photos, but golly, it’s been a really long day and I am tired.
I never did have that coffee.
——–
Update March 9, 2018
Dottie continues to make progress. She is still a bit smaller than her new Production Red sisters but she is standing upright, eating good, no pasty butt, and…WooHoo!! is beginning to grow tail feathers! (Doesn’t take much to make me happy.)
For the original 5 Buff Orpingtons, the larger chicks, I installed the new watering cup and am helping them to learn to drink from it. During the day I just keep checking on things but for the night I put their old waterer in the brooder. Can’t have dehydrated chicks!
Update March 12, 2018
The chicks are doing well. Dottie continues to be smaller than the others. Here are some photos from today. One of the larger chicks escaped but did not get far.

Another of the larger chicks decided to try perching on the side of the brooder.

The larger chicks are looking good.

The smaller chicks are doing well; Dottie is in the corner. She is still quite small.

I have to dog-sit the little Chihuahua for two more days – Tuesday and Wednesday. After that, I can use the floor space to make a larger brood area for the chicks. Here are a few pictures of Chico. He is an excellent lap dog. 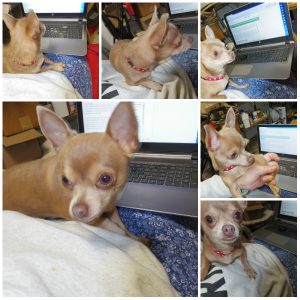
__________
Update: March 15, 2018
Chico, the little Chihuahua is home with his family. Today I went to Animal Services and bought Chico a dog tag; he is a totally legal dog now. The Humane Society shares the same parking area so I stopped in and bought an identification tag for Chico. I had them put the name Chico plus the owner’s phone number on one side of the tag and on the back of the tag, I had them put two more phone numbers, one of them is my own. That way, if the dog should get lost, one of us should be able to answer the phone and bring Chico home. In about 2 weeks the dog across the street has an appointment to get all his shots and will be neutered. I am gonna conquer the dog problem one dog at a time and am making friends at the same time.
The ten chicks were outgrowing their brooders. Well, all except for Dottie who refuses to grow. Just a note here; many years ago I read a book and it became one of my favorites. It was written by Gunter Grass and is titled “The Tin Drum”. The main character is Oscar. He is a boy that refused to grow; it’s not that he could not grow, he just refused to do so. I believe Oscar and Dottie have something in common.
Over on a Facebook homesteading group, I learned about a way I could keep the chicks confined indoors until they are old enough to go outside. It involves a kid’s wading pool, plus a dog exercise pen. I happened to have both items so all it took was some effort to clear a space in the plant room…it took me two and a half days of hard work and a lot of pain but I got it done. Have a few adjustments to make for the waterers and feeders but so far so good. Plus…my dogs like to visit the chicks.


Something good happened. I came home to find two packages on my front steps. I thought they were things I had ordered for the chickens, but no. They were something else. I contacted the company and reminded them that, although I had intended to order from them, I had not actually finalized the order nor had I paid for it. No problem, they told me that, since I had informed them that there was a glitch in their shopping cart/ordering system, they decided to send me the items for free. I am amazed. The order was worth more than $100. Wow! Certainly needed to sit down after that one!
Gonna rest now. Maybe sleep a bit. Getting old is difficult; being in constant pain does not help much. Thinking back on the situation that caused me to be upset, I decided it’s not worth dying just to make other people happy. If someone or more than one someone is acting like a troll, I will not let them bother me. I’m gonna go talk to my dogs now. The dogs give me unconditional love.
———-
Update March 17, 2018
Some kind person in the Backyard Chicken Forum advised me to add raw egg and fish to Dottie’s diet in addition to the Nutri-Drench. Dottie is doing much better. She seems stronger. Is walking better. Her feathers are beginning to grow. Here she is:

———-
Update March 18, 2018
After taking care of the dogs I checked on the chicks. Oops, I have no more food for them!! So instead of relaxing, I had to pile all 3 dogs into the car and drive over 30 miles to buy chicken food at Tractor Supply – the only store opened and selling chicken food on a Sunday.
Arriving home it took all my strength to hoist that 50-pound bag out of the car and onto the front porch. I slit open the bag and scooped the food into convenient, easy to handle plastic canister…like this:

Headed into the plant room which is also the chicken room, I fed the chicks then looked for another plastic canister. Ah, there’s one, on the floor. And…dang…it is full of chicken food. I did not know that I already had chicken food and I just drove a round trip of over 70 miles to buy food. Getting old is very interesting, but sometimes a bit expensive and time-consuming. Feel free to laugh with me at my mistake.
Anyway, while I was at Tractor Supply I talked to the young man who helped me buy the chicks and told him about the runt named Dottie. He said it’s possible that she may be a Bantam; he said sometimes the chicks get mixed up. I will now do some research to learn about Bantams.
———-
Update: March 22, 2018
I made a post over on the Backyard Chicken Forum but it fits here.
Pycoppe is a surname from Lancashire, England. Meaning: “hill with a peak or sharp point”. Alternate spellings: Piccop, Picopp, Peacop, Pickhup, and Pickup. I will apologize to anyone who has this surname; I mean no offense.
Way back when I was 21, working with 18 other silly young women at a bank filing the canceled checks, we would sometimes call out the names on checks to keep things interesting. One name that crossed my desk was Pamela Pickup and we all had a good laugh. At that time I did not know the history of the name, hence the apology now.
Why am I saying this? Out of the 10 chicks in the brooder, only one has thus far earned a name and that is Dottie, the runt – she is named Dottie because I had put a dot on her head to better monitor her progress. But today, several times today, one large chick stepped forward and allowed me to tickle her chin, stroke her head and to pick her up…so I am naming her Pamela (after Pamela Pickup). Hopefully, the other 8 will earn a name soon. I never realized how difficult it is to name chickens when there are no rug rats, toddlers, or preschoolers in the home! Kids can invent the best names!
I’m gonna have to learn something about leg bands to tell the chicks apart.
Is it okay to use the tiny hair elastics? Or is something more professional required?
__________
Update: Mar 23, 2018
Leg band research.
Since I have 10 little chicks I want to put leg bands so I can tell them apart as they grow.
Looking online at chicken leg bands I found several choices. One of them looks just like the cheap plastic spiral knitting markers I purchased several years ago. Heading down the research rabbit hole I searched for knitting markers.
Oh, my!! I want to go back and live my life over again and create artistic knitting markers! I was blown away by the imaginative designs that are available. One looks like something I would have made back in the day when I was working with silver jewelry. Can I have a life do-over?!!
https://www.etsy.com/listing/4…
Life is interesting with chickens. I decided to buy these leg bands.
https://happyhentreats.com/products/ez-leg-bands-small?variant=39690450189
________
Update, April 1-3, 2018:
The chickens are quickly outgrowing their indoor brooding area. This chick has discovered the window and is looking forward to being outside. Um, yes, I realize there is no interior trim on the window. Please remember that I am living in a not-quite-finished house. Hopefully, I’ll get around to the inside carpentry when winter arrives.

Even the little runt named Dottie is growing; no image today but I’ll bet one soon.
As Y’all know I like to pick up stuff at the roadside for free when folks discard things. Free is good. The word I need to use now is serendipity. Almost a year ago I stopped to ask permission to pick up some lumber. The man had dismantled a set of bunk beds and was only too happy to have me take the wood. About 6 weeks ago I stopped at my friend Will’s house and picked up something that was almost too heavy for me to put into my small car. It was a framework of 2 x 4s with some plywood on top. I have no idea what the original purpose was but I hauled it home.
So here I am trying to design a chicken coop. It will be raised up about 24 inches from the ground and will have an attached run. I now have only the original 6 Buff Orpington chickens. The 4 Production Red chickens were given to a man I met in Home Depot. He wanted the 4 chickens to give to his dad who had recently lost his chickens to a roaming dog. Now that there are only 6 chickens helps enormously as designing the coop is easier now. I got out my trusty measuring device and start measuring the lumber in my yard and…can you believe it!!! The plywood platform measures 72 inches by 39. The wood from the bunk beds measures…Whoa!!…72 inches. Serendipity!! If I had to buy a sheet of plywood it would have cost between $25-$38. Yikes. Roadside shopping sure saves money! Here is the floor after cleaning.

For the time being, the coop will be 72 x 39. The chicks are not yet full grown so the space will be adequate. Yes, that’s slightly on the small side for full-grown Buff Orpingtons, but I will do a makeover and add a nesting box and make an addition on the opposite side to extend the floor space about 2 feet.
Okay, that takes care of measuring, planning, and designing. Now I gotta make room for the coop and run. Time to get down and dirty in the garden. First I have to move about 150+ plants…It took me the best part of three days to move all these plants. Some needed to be divided and repotted, watered and all that. I still have to add labels to the plants that are headed to the swap.

Then I had to figure out how to lift up a huge wooden raised bed frame. This frame was originally for the raspberry bed but that bed got taken over by goldenrod while we worked on fixing the house. The next thing the frame was used for was to corral the many plants that were moved from my old garden to this new property. Now that the plants are out, the frame is out…I don’t yet know what it will be used for, but it will definitely be used for something. This frame was really heavy. I could barely move it. I pushed, pulled, dragged, cursed and managed to get it out of the way of the area for the coop and run.

I dragged one of the 14-foot long 2 x 10s (a gift from a neighbor who works construction) into place just to get an idea of how much more space I needed to clear. Ugh. Quite a bit more. Here are the before and after images…


Right smack in the middle of that spot is what’s left of the Celeste Fig tree. It was not a good producer so it had to go. I won’t bother to remove the tree stump as it will be under the coop area.
That’s as far as I got so far. Gotta eat more protein and build some muscle to get this job done. Sheesh, all this for a few free eggs. Is it worth it?
_______
Update: April 24, 2018
Whew, the past couple of weeks have been…not good. Younger daughter made the difficult decision to have the big dog put down (cancer, arthritis, pain, etc.), then I got sick (sicker than normal) for over a week, plus had to keep the neighbor’s dog in my house after surgery…no time or energy to build the coop. Daughter arrived for a visit. After she left I had a good scare when my car tire blew out.

I gathered some strength and got back to work. Went to Lowe’s and purchased VCT squares and glue for the floor of the coop. Ran out of glue. Ugh! Bought more glue and finished the tile. Not the best job but at least the coop floor will be a bit easier to keep clean. Sorry about the shade but here is what the tile looked like after I cut and laid it all out, and a photo of what I finished before I ran out of glue.


Hauled the extremely heavy 14-foot long 2 x 4s into place. Cut two 2 x 4s 72 inches long. Screwed them together to make the base frame of the coop and run.

The weather did not cooperate. Thunderstorms and extremely heavy rain most of one day. Over four inches of rain fell. Soggy ground; not good for working outside but I ran between the raindrops, made some measurements and spent some time indoors drawing the design. During a break in the storm I cut some 2 x 4s, screwed them into place, then carefully (so as not to damage the floor or hurt myself) I hauled the floor to the back and somehow miraculously hefted it up onto the four uprights. This is not the normal way to build a coop but it was all I could figure to do to make use of the free floor. Then, of course, more rain happened, so I covered the floor with a tarp and ran into the house. The floor is somewhat warped but that won’t bother the chickens.


Update: April 25, 2018
Today I began assembling the first wall section. Cutting braces for the corners is always tricky when a person has dyslexia but… ![]()
![]()
![]() No mistakes!!!
No mistakes!!!
After putting the first section together I measured it to see if it was square. Not quite. So I took one corner apart and fixed that. All square now. That’s enough work for a while. If I get another burst of energy I’ll tackle the next section, either later today or tomorrow, weather permitting


While I worked the dogs, George and Jack were snacking on the swamp sunflower leaves.

And some good news! I’ve been trying to kill a plant for two years. Today it made a flower. It’s Comfrey!

Update: Apr 27, 2018
Yesterday no work got done on the coop. I had a low energy day so I went to Home Depot to buy some more 2 x 4s. Most of the coop is reclaimed wood but for the inside, I wanted new wood. I selected 6 very nice, straight pieces, loaded them onto a cart, left the cart and went to get a box of screws. When I got back an overenthusiastic employee had put the lumber back on the pile. No worries. She knows me and apologized. She remembered where each piece of lumber was and loaded them, gave me a nice discount, and found a handy helper to load the wood into my car. On the way home I ran a few errands and it was a good day.
Got up early this morning to work on the coop; the weather was perfect T-shirt weather. Measured and cut the wood (had to do it twice as I wrote the wrong measurement the first time), drilled holes and screwed the second wall together. Added corner braces. Everything is square. Here are the two long walls framed and ready to go. Halfway through the work, some evangelists stopped by. I gotta admire their spunk. Just because of my surname, they assume that I can speak Russian. (Greene is not my real surname; my surname is Czechoslovakian.) Nope, I can’t speak Russian, nor was my late husband Russian, but I do have a friend named Mark who wrote am academic Russian dictionary. I told this to the evangelists but they were not interested. They left me a card.
(This is what Mark worked on: http://www.academia.edu/425345…)

At this point, I had to stop myself. Since it will be necessary to add some kind of wire barrier under the coop and run to prevent predators from digging up and in from the bottom, it would be wise to not add any more weight just yet. Okay, now to find some wire…Um, where did I put…? You know how I am forever picking up stuff at the roadside, right? Well, last night I was thinking of how to avoid spending money to buy wire fence material and it dawned on me. I had picked up a roll of chain link fence fabric. I located the roll of fence material but there was a slight problem. During one of the hurricanes, a dead tree belonging to the neighbor decided to fall in my yard. The fence material was under the dead tree, and the dead tree was covered with a Wisteria vine. Lovely. Well, yes Wisteria is lovely but I was using the word sarcastically just now. Time to drag out the electric chainsaw. the super long extension cord…ho, hum…start hacking away. Whew. After a few Lou Ferrigno moves (not very ladylike squats plus some grunting sound effects) I cut the dead tree into pieces, and lifted it high in the air and tossed each piece a whole 3 feet away.
Okay, the fence material is finally free…twice! It measures four feet wide. Now to measure how long it is. Looks good. A little longer than I need. Perfect. So, drag it 100 feet, lay it inside the wooden frame and…oops, needs to be 6 feet wide. Oh, well. Start looking around the yard and, ah, perfect. Folks who think they want that plastic coated wire shelving in their closets often change their mind and toss that stuff. I pick it up. Lots of it. The hardest part was trying to figure out how to get the shelving wire under the heavy wooden frame.
I used one of these (whatever it is that I got at a yard sale for 25 cents:

Levered up the heavy wood frame, stuck a brick under, slid the shelving under and, rinse and repeat several times. I got a bit dirty as this job required me to be up close and personal half kneeling/half laying down. But it’s in place! Tomorrow I will use some J-clips to join things together. That’s two layers of commercial grade landscape fabric under the wire to prevent unwanted weeds from popping up. Oh, and don’t worry that it’s not beautiful; it will be covered, hopefully, tomorrow or the next day that the weather cooperates.

Update: April 28, 2018
Whew, started at 8;30 am, worked on the coop to secure the wire fence material. The J-clips were too small and I could not find the hog rings so I just used pliers and lots of strong-arm techniques. My grunting noises are improving.

Then I took a rest, walked dogs, ate breakfast and all that jazz.
Update two for the day. Back out to work some more. Here is the midday view. The next carpentry will have to be done on a ladder. Wish me luck!

Since the chicks are still young I will be adding the next box later. For now. I am using two of these bins for measurements to do the framing and will figure out later how to create and attach external next box.

Whew! Third update today. It was a good day to work outside.
Okay, I attached a few more pieces of lumber, nothing exciting there. Decided to try to pull the warped area in a bit…yep, I can do this. The screws are temporary. Also, I had to tie the top to pull it together. I’ll let everything sit for the night so it can think about what it’s done. Maybe in the morning, the wood will decide to not be so warped.


So at 6:30 pm this is the coop; how am I doing so far? Not bad for an old, disabled woman working alone, right!? Sure hope the chickens appreciate the effort. Oh, I have decided to paint the coop barn red with white trim. The wood in the run will be painted white and the access door will be red…or maybe some strange and exciting color. I still have to build the door.

Update: April 30, 2018
Seems my original color scheme was all wrong. The new color will be a lovely dark teal called ‘Splashy’ with white trim. This will be the best chicken coop in the entire world.
*******
Inserting a quick hello and a great big thank you to my local Sherwin Williams store!!
*******
Update: May 1, 2018
I worked hard today not that I have much to show for my effort.
The professional paint person advised against using the cedar wood…but, since I have no money to buy another type of wood, I seem to have no choice but to use what I have. I have some fake Tri-Sodium Phosphate and I used that to scrub down all the cedar wood, front and back. Then I used some bleach…okay, yes, I know bleach should not be used on wood but I did not happen to have any oxalic acid teak wood cleaner on hand. Ran out of bleach. Ran to Walmart. What the heck, while I was there I grabbed one of the handicapped electric carts and did a quick grocery shop. Did good; only $36. I even remembered to buy the bleach. WooHoo!!
Arriving home I quickly put stuff into the frig, said hello and apologized to the dogs, went out back and finished cleaning the cedar wood. Dang, I rinsed and rinsed…this is getting tiresome…and rinsed a few more times. That’s it. I’m done.
Does this look like a whole days work?

Oh, I forgot something. In the middle of washing and rinsing the wood, I caught some movement out of the corner of my eye. Aha, the little dog (his name is El Gato) that I took care of escaped and ran across the street to come to visit me. I quickly scooped him up and carried him home. After helping the young lady of the house to secure that dog and their other dog, I was treated to a viewing of their newly hatched chicks. Oh, so cute. I could not count them accurately but it seemed to be about 10 or 12.
When the cedar wood is dry – really dry, I will seal it will either Kilz or Zinsser…which I still have to buy. When the coop gets finished, this had better be the best dang chicken coop on the planet. Sure it taking long enough to build.
Update: May 2, 2018
What a weird day. I loaded the dogs into the car and before I could put the key into the ignition, my older daughter called to see if I was okay. Um, why? Seems that a plane fell out of the sky and she wanted to make sure it did not land on my or my house.
Checking the news – it was a C-130 Hurricane Hunter based in Puerto Rico with a crew of five. They were traveling from Puerto Rico via Savannah and then on to Arizona to the plane ‘boneyard’. Sadly, the plane crashed and all perished. The road will be closed for quite some time while they do the cleanup and investigation.
The dogs and I managed to get to Home Depot where I purchased some Kilz 2 to seal the cedar wood. It’s been a long day and this is all I have to show…same wood from yesterday but now one side and one edge have been sealed with the Kilz. Tomorrow, weather permitting, I will seal the other side and the edges.

Update: May 5, 2018
Happy Cinco de Mayo to everyone!!!
I am invited to attend a baby shower today between noon and 4 pm. Hmm, I have a bit of time to do just a small amount of work on the chicken coop. I measured, cut, and attached some 2 x 4s to frame the pop door and get ready for the siding on one of the longs sides of the coop. It may not look like much, but I’m happy with the way it is turning out. This will all make more sense after the siding is installed.

After supper, a short rest and walking dogs, I installed a few pieces of siding over the pop door. Here are the outside view and the view from inside the coop. I had to stop because it was getting dark and the mosquitoes were getting. The pencil marks will be painted over, no worries.


*******
Note: Writing a note to myself. Something I learned today about keeping lice and mites under control in the coop. Have not researched but I will. Clean out the coop (wear old clothing and breathing protection), sprinkle some Sevin dust in the coop and on roosts. Use LD-447Z fogger to fog the coop (closed up tight) for one hour, then let air out for one hour. To treat the chickens use Ivomec Pour-On for Cattle. About 8 drops per bird, use a dropper to apply directly to the skin along the back from neck to the tail (3-5 drop for bantams). Do this process twice a year in April and again in October. Should control lice and mites. I still need to research the amount of time to not use the eggs or meat as the information keeps changing.
*******
Update: May 6, 2018
I thought today would be a good day to work outside but it was not very pleasant. The clouds were nice but it was very humid with somewhat bad air quality due to people burning. Taking it easy I got a bit of work done. The siding that I added yesterday needed to come off and get redone. Oops. Live and learn. Took the dogs to Home Depot to buy more screws but when we got home there was no energy left. Tomorrow will be a better day. Here is the siding near the pop door viewed from the outside and from the inside of the coop.


While the coop is being built the chickens remain in the guest room. Little Dottie made me smile when she finally learned to fly up onto a roost. She has her own roost which is lower than the big chicks. Here they are:

Update May 16, 2018
A sudden rainstorm happened, halting work on the coop. It will be raining on and off for the next ten days so I’ll have to run between the raindrops to get any work done.
Yesterday I was able to scrounge some plywood. I had been holding off finalizing the roof plans hoping to avoid unnecessary expense. The free plywood helped to decide the final roof design.
Here is a handy video showing how to make the bird’s mouth cuts for the roof rafters.
https://www.youtube.com/watch?…
Update May 19-20
Working between raindrops and rain showers I managed to get a bit of work accomplished. I made a frame for the floor of the exterior nest box. I was especially proud of myself for not making any mistakes. It came out correctly the first time. It may not look like much but I made it in such a way that I can add insulation to hopefully keep the chickens a bit warmer in winter.


Noon, May 21, 2018
I had to rethink part of the floor unit for the exterior nest box as some of the plywood would not cooperate. I decided to use the fence pickets instead. Much easier for me to work with but it did use up quite a few extra screws. The rain held off and I was able to cut and fit everything, then I cut the insulation and screwed down all the little floorboards. It looks rather nice.
The insulation is Eco-Foil 48″ and was totally free. A neighbor tossed the entire roll as trash and I made it fit into my little car. That was back in March. When I picked it up I had no idea what I would use it for but I never argue with free stuff.


Here is the floor showing the insulation, and the finished floor. Everything still needs to be caulked and painted.


Update May 29. 2018
There is a sub-tropical storm named Alberto that decided I needed to take a break from working outside. In between rain showers, I managed to get a bit of work accomplished. Installed one 2 x 4 horizontally on the west-facing side of the coop, cut 11 siding boards to length, managed to install 4 boards before the drill/driver ran out of battery.
(There should be a photo here but it’s lost in my laptop somewhere; if I find it, I’ll add it later.)
One of the things I have been stalling on is the east-facing side. That is where the clean-out door will be. I want to incorporate a window into the door itself. I’ve used the rainy days to research and gather useful information. What I want to do is avoid buying a ready-made window.
Here is one of the ideas that I am considering:
https://www.youtube.com/watch?…
There is a window in a door here:
https://www.youtube.com/watch?…
Sliding windows using polycarbonate:
https://www.youtube.com/watch?…
Lots of possibilities. I am still deciding how to make the window within the door.
Too early to think about making a chicken tractor but I wanted to save this link showing how to make tractor wheels. http://avianaquamiser.com/post…
I found a better plan for a chicken tractor. Joel Salatin is like the guru of pasture-raised chickens. This opens up lots of new possibilities and may reduce the amount of work I do to keep the ‘Back 40’ mowed.
https://www.youtube.com/watch?v=O1-MbPwaY6Y
John Suscovich worked out an improved chicken tractor and is selling the plans. https://farmmarketingsolutions.com/stress-free-chicken-tractor-plans/
Okay, back to the coop. Too late to start over but if I build another coop it will look very much like this…except it will be painted funky colors.
https://www.seattlesundries.co…
Update June 19, 2018
It’s hot. Really, really hot. But it’s not raining so I went out back to work on the coop. As you know, I had a hard time figuring out how to make a ventilation door to keep the chickens cool yet safe from predators. The idea finally formed, it took a few weeks to get it all together in my head. I bought hardware, adhesive, gathered stuff together. Then I misplaced the hinges. I had to drive back to Home Depot and buy more hinges.
Today was the big day. The ventilation door is now attached to the coop. Yippee! The photos may not make sense as the door is just hanging in the middle of the space, but it will be perfect after I get all the other bits and pieces attached. After that, I will tackle the roof. Then the run. No big deal. I have the rest of my life to finish the coop.
Here is the ventilation door:

Oh, and the chickens? Sadly, they are still in the guest room. No sane person would have chickens as a guest. But they are good company. They chit chat, they have learned how to beg for treats. Two days ago I gave them an overripe banana. Yesterday they got a lovely tomato. Today I picked the seed heads of the Bahia grass and a few sprigs of Goldenrod stems. Two of the chickens now allow me to pick them up without them freaking out. One chicken does not care to be picked up so when I approach he/she flies up, bounces off my head, jumps on my back and runs away. Well, as far as a chicken can run inside a guest room. It will be a happy day when they are finally living out back where they belong and I can clean, sanitize, deodorize, clean again and reclaim the room.
Update: July 11, 2018
The chickens are outside!!
Since I don’t yet have enough money for the materials to complete the chicken coop I made a smaller, temporary coop. I am calling it a coop-ette. (Probably not a real word.) I should back up and explain how this happened. A few weeks ago I responded to a post. Someone wanted to rehome their rabbit and a rabbit hutch was included in the small rehoming fee. It was such a good deal that I rented a truck from Home Depot and drove over to pick up the hutch and the rabbit. Well, surprise, surprise! The rabbit belongs to a magician! It seems the tiny rabbit grew too large to fit into the hat for the magic tricks so it needed to go to a new home. As for the hutch, well, I had plans for that. Using the materials on hand I raised up the hutch, added 1/2″ hardware cloth, secured the existing doors, added a new door and…here is the result.

So finally, after 22 weeks of residing in the guest room, the chickens are outside where they belong. Oh, and the fun part. I picked up Dottie and one other chicken to carry them out to the new coop-ette. Then I went back inside the house to pick up two more chickens and what do I find? Look:

After I managed to carry all the chickens outside, got the food and water in place…guess what?! Look…another egg!

The chickens are a bit crowded right now but today I will work on adding a temporary outside run. I have a dog exercise pen and will add a bottom frame with fence wire on the ground and poultry netting on the top.


Update: July 13, 2018
The chickens are enjoying being outside. The dogs and I visit them several times a day and make sure they are okay. This morning I rigged up the exercise pen and the chickens quickly learned to take advantage of the extra space. I also added an extra roosting bar as they were a bit crowded on the single bar.
Late this afternoon I made a run to the local Walmart to buy a few small solar lights as the chickens are accustomed to having a nightlight (not too spoiled, are they?). Just before dark, I was happy to see that all the chickens had put themselves to bed and were up on the two roosts…well, except for one who was up on a shelf. I suspect that one might be a rooster rather than a hen or maybe it’s just acting as a big sister. So far, they have given me 3 eggs.
Update: September 10, 2018
Getting up to 4 eggs per day now so at least 4 of the chickens are girls. Have not heard any of them crowing. That’s a good thing. Oh, and those folks across the street (remember the dog with the bone in his throat?); they came knocking asking or help. Seems there was a dog in their yard killing a chicken. So, since I am the designated Dog Whisperer in these parts, I walked over and calmly placed a looped leash around the dog’s neck. The beautiful, huge red-nosed Pitbull only half-grown and really peaceful. Police, Animal Services and the Sheriff arrived to take control of the situation. All in a day work for me. Just sayin’.
Update: September 21, 2018
If you have never heard of or visited Facebook Marketplace, you don’t know what you are missing. It is a great place to buy and sell. Kind of like a yard sale but it’s one item and one person at a time. I responded to an offer for clear polycarbonate roof panels. I believed they were something like $6 apiece. That’s a lot better than the regular retail price so I drove 25 miles to buy a few. Nope, the price was wrong. They were only $3 each. Technically, $2.99. I bought 12 and will not be able to construct the roof for the chicken run. WooHoo!!
Update: An entire year later.
Ugh! Things happen. Nothing gets done. Why complain? Just start again where you left off. Unless, of course, you have decided to totally rethink and redesign the whole chicken coop plan.
Update: October 2019
I had an idea. Looked online. Not sure if anyone has done this yet. I bought a used trampoline; it’s a 12-foot one. It was completely disassembled and I had one heck of a time trying to put it all together without instructions but the basic plan is to assemble it in 2 parts, like two half circles. Then the half circles will stand up just like two arches. Yep, that’s the plan. The center will be 6 feet tall so there will be plenty of room for a human door. I’ll be adding metal pipes to make the width…not sure of the size yet but probably about 8 feet wide. Add wood to the ‘top’ to allow corrugated roofing panels to be attached. That should keep out most of the rain. The trampoline fabric will become a sunshade. Still working on the idea. Almost ready to take some photos.


